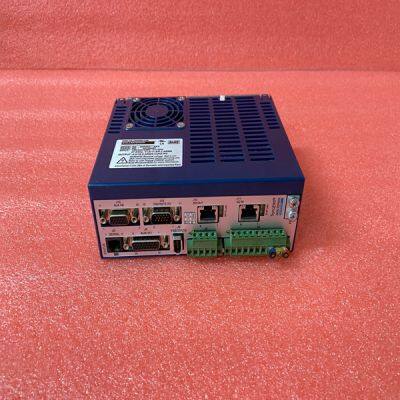
KOLLMORGEN S20660-SRS
Product Details
Product Details
Product Description
Product DescriptionBrand:KOLLMORGEN
Type:S20660-SRS
Origin: the United States
Warranty: 365 days
Colour: new/used
Shipping method: Courier delivery
Spare parts spare parts, the main DCS control system of PLC system and the robot system spare parts,
Brand advantage: Allen Bradley, BentlyNevada, ABB, Emerson Ovation, Honeywell DCS, Rockwell ICS Triplex, FOXBORO, Schneider PLC, GE Fanuc, Motorola, HIMA, TRICONEX, Prosoft etc. Various kinds of imported industrial parts
Note: You must give each MVI69E-MBS module a unique name. The default name on a duplicate module appends a number to the end such as MVI69E-MBS_000, MVI69E-MBS_001, etc. 6 You can rename the module by right clicking the module and choosing Rename. 7 Configure the module parameters. See Module Configuration Parameters (page 39) and then export the AOI .L5X file for the new module (right-click the module and choose EXPORT AOI FILE. See Creating and Exporting the .L5X File (page 24)
2.5.2 Adding Another Module in Studio 5000 You can place multiple MVI69E-MBS modules in the same rack provided it does not exceed the power distance rating of the CompactLogix or MicroLogix 1500-LRP rack (see System Requirements (page 8)). Adding an additional module to the rack is similar to installing a new module; however, the name of the module must be unique. 1 Start Studio 5000 and open the project. 2 In Studio 5000, locate the I/O CONFIGURATION folder. Right click COMPACTBUS LOCAL and choose NEW MODULE.
In the Select Module Type dialog box, select the MVI69E-MBS module. o If you are using an Add-On Profile (AOP), this adds the MVI69E-MBS module and configures the relevant parameters. You must be using RSLogix version 15 or later to to use an AOP. o If using an AOP is not an option, select GENERIC 1769 MODULE and click CREATE
The New Module dialog box appears. Enter a unique name for the new module, and confirm the slot number of the new module. 5 Click OK. The new module is now visible. 6 You must also import the Add-On Instruction (AOI) for the new module (see Adding another module in PCB (page 29)). In the Controller Organizer pane, double-click MAINROUTINE to open the ladder for the routine.
This opens the IMPORT CONFIGURATION dialog box. Click TAGS to show the controller tags in the AOI. You must edit the FINAL NAME column of the tags for the second module to make them unique. 10 Associate the I/O connection variables to the correct module in the corresponding slot number. The default values are Local:1:I and Local:1:O. You must edit these values if the card is placed in a slot location other than slot 1 (Local:1:x means the card is located in slot 1). Since the second card is placed in slot 2, change the FINAL NAME to Local:2:I and Local:2:O. Also, you can append a ‘_2’ at the end of the FINAL NAME of ‘AOI69_MBS’ and ‘MBS’ arrays as shown below.
>> Environmental Salt Spray Test Chamber/Nozzle Salt Spray/Cyclic Corrosion Salt Fog Spray Machine
>> Mk High Yield Turnkey Fermentation Lysine Plant
>> New 110t Professional High Quality Horizontal Plastic Injection Molding Machine
>> Tube Disc Plough Farm Implementsdisc Plough Agro Implements
>> Automatic H Type Poultry Farming Equipment Battery Layer Chicken Cage System
>> Multi-Pockets Waterproof Outdoor Sport Motorcycle Drop Waist Fanny Pack Thigh Leg Bag
>> original koyo bearing koyo ball bearing Tapered roller bearing auto bearing koyo bearing
>> Biobase Blood Collection Monitor Blood Bag Weigh Monitor for Blood Bank
>> Factory Sale Kazoku Front Suspension Car Shock Absorber for Kyb 339115 for Toyota Matrix 2009-2011
>> Ethernet connector male network crimp connector RJ45 WITH IRON /FTP rj45 modular plug
>> Fingerprint Biometric Time Attendance with Webserver (5000T-C)
>> Factory price for pure water 5 gallon filling machine / automatic 20L bottling filling line
>> 5V Heated Jacket with Waterproof and Softshell Design
>> Automatic Small Double Head Horizontal Woodworking Drilling Machine
>> Cycjet Lf30f Online CO2 Engraving Machine for Glass Bottles
>> Dfaspo Wholesale Inflatable Nylon Double Layer Kayak
>> China Cheap Price Home Garden Farm Use Rubber Skid Steer Loader Big Power 23HP Ht380t Mini Front Loader
>> Bicycle Handlebar Grips Bike Rubber Grip
>> Laminating Film Roll Cutting Machine
>> Custom Cubic Jade Stone Plinth Side Table Square Display Cube Block Marble Plinth Green Pedestal Side Table
>> J225 Tws Wireless Headphones Earphone Gaming Low Latency Earbuds Headsets
>> Mh6330 Low Price Wholesale Mh6330 Milling Machinewith Cooling System
>> High Grade Quality Silk Crinkle Georgette Embroidery Fabric
>> Fresh Carrots for Export with Sweet Taste Good Quality Cheap Price From China
>> QMB525D-H Woodworking Industy Single Side Planer and Thicknesser
>> Zlc-130t Aluminium Injection Molding Machine
>> Wholesale Eco-Friendly Outdoor Wall Decoration Mcm Soft Flexible Stack Stones Tile
>> 100% Silver Lining RF Shielding Emf Blocking Anti Radiation Scarf Neckerchief
>> China Factory Supply Exterior/Interior Steel Security Copper Door
>> 108 series thermal break aluminum profile sliding window with stainless steel sliding screen window